Info:
Calendar functionality was integrated into Thunderbird with version 78.0. If
you don't see any options to add or view a calendar, please make sure to update
Thunderbird to the latest version.
-
Set up an application-specific
password and make a note of it.
-
Click on the menu icon in the top right corner of the
Thunderbird window.
-
In the New submenu, select
Calendar.
-
Select the On the Network option and then
Next to continue.
-
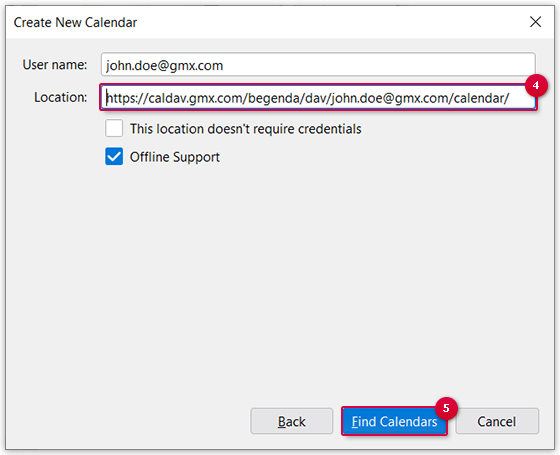
In the User name field, enter your GMX address.
-
In the Location field, enter the path https://caldav.gmx.com/begenda/dav/your GMX email
address/calendar.
Example: For the email address john.doe@gmx.com, you enter https://caldav.gmx.com/begenda/dav/john.doe@gmx.com/calendar/ as the
location.
-
Click Find Calendars.
-
Enter the application-specific password you created in step 1 and click on Sign in.
-
Under Calendar Type choose CalDAV.
-
Under Properties give the GMX
Organizer a name and, if applicable, a color. Appointments
from this calendar will later be displayed in the color. Click
Subscribe.
Your GMX "My Calendar"
default calendar is now synchronized with Mozilla Thunderbird.
Info:
If you retrieve your emails via POP3/IMAP, you will then need a separate
application-specific password. Use this instead of your usual password in the email
programme or the email app provided by the other provider.