Navigation auf-/zuklappen
Setting Up Outlook (IMAP)
Synchronize your GMX mailbox with Outlook. Your email will be sent to your application in regularly intervals using IMAP.
How to add your email account to Outlook 2019
-
To synchronize your emails with IMAP or POP3 you need to activate this feature
in your GMX account. Click Email → Settings → POP3 & IMAP → Send and receive emails via external program [...]. Confirm the altered settings by clicking
Save and start your external email program.

-
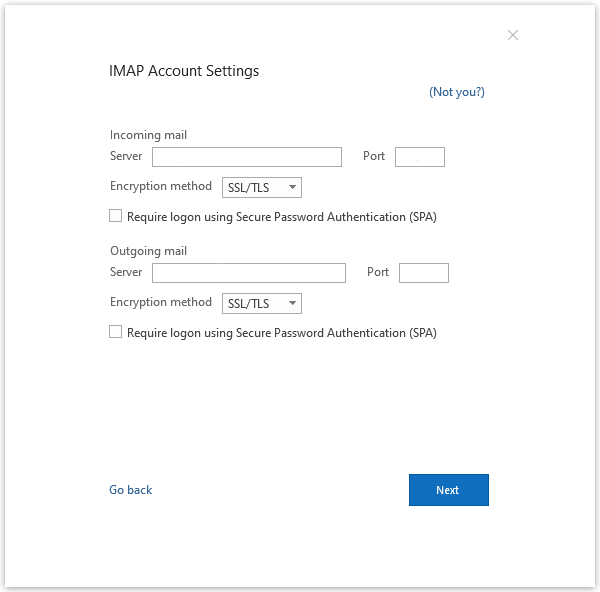
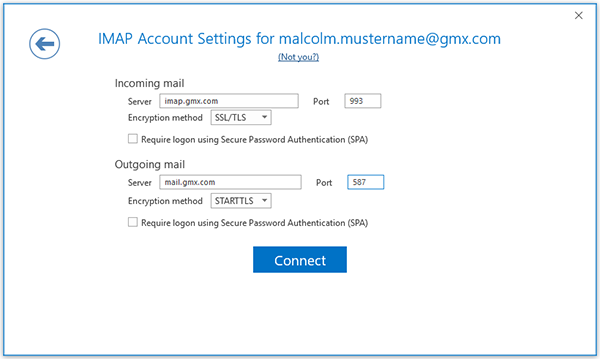
Use the following settings:
- Incoming mail: Server imap.gmx.com with port 993 and check the option This server requires an encrypted conncetion (SSL/TLS)
- Outgoing mail: Server mail.gmx.com with port 587 and the encryption method STARTTLS
How to add your email account to Outlook 2016
-
To synchronize your emails with IMAP or POP3 you need to activate this feature
in your GMX account. Click Email → Settings → POP3 & IMAP → Send and receive emails via external program [...]. Confirm the altered settings by clicking
Save and start your external email program.
-
Use the following settings:
- Incoming mail: Server imap.gmx.com with port 993 and check the option This server requires an encrypted conncetion (SSL/TLS)
- Outgoing mail: Server mail.gmx.com with port 587 and the encryption method STARTTLS
How to add your email account to Outlook 2013
-
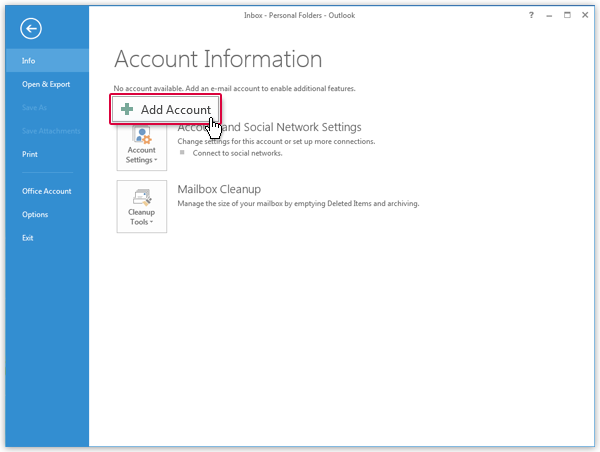
Click
File, then
Info and the
Add Account button.
-
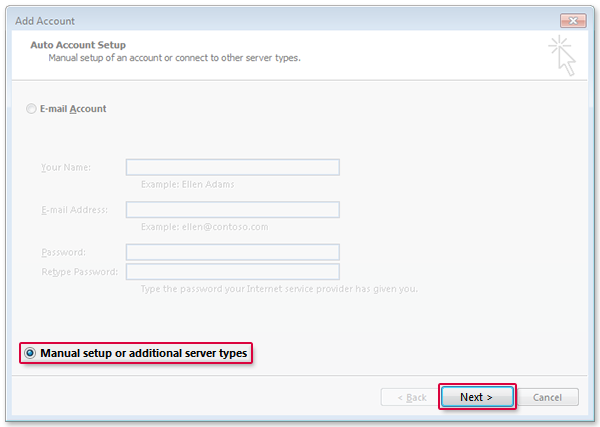
Select
Manual setup or additional server types and
click on
Next.
-
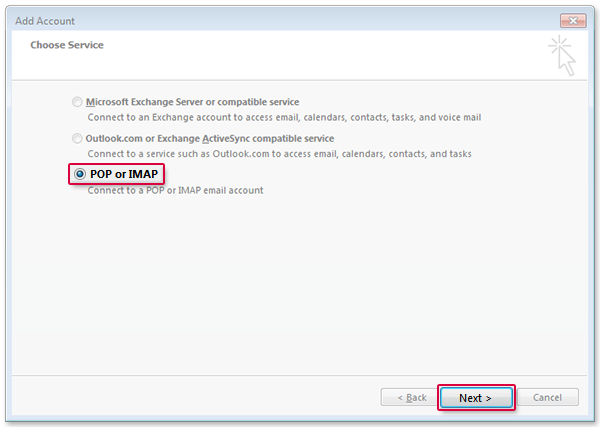
Select
POP oder IMAP and click
Next.
-
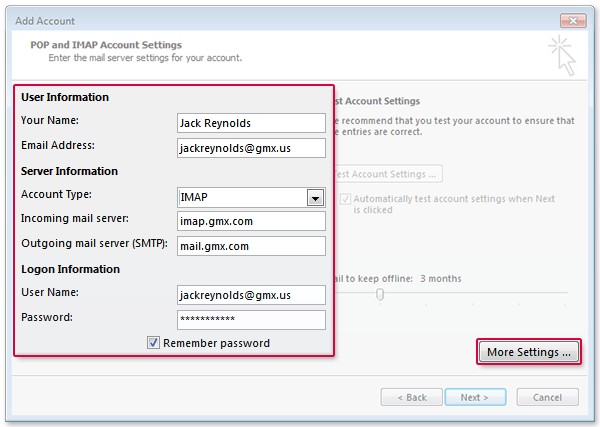
Enter your name and email address. Select IMAP for the
account type and enter imap.gmx.com as incoming server and mail.gmx.com. Enter your GMX username
and password. Click More Settings.
-
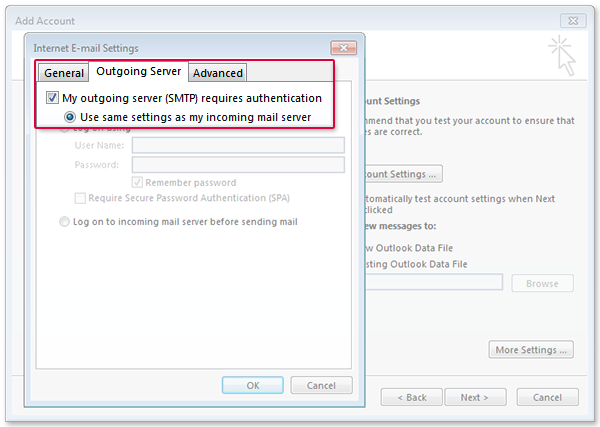
Select the
Outgoing Server Tab. Check
My outgoing server requires authentication.
-
Select the
Advanced tab. Enter
993 next to
Incoming Server and select
SSL as encrypted connection type.
Enter587 next to
Outgoing Server and select
TLS as as encrypted connection type (a). Click
OK (b) and
Next (c).

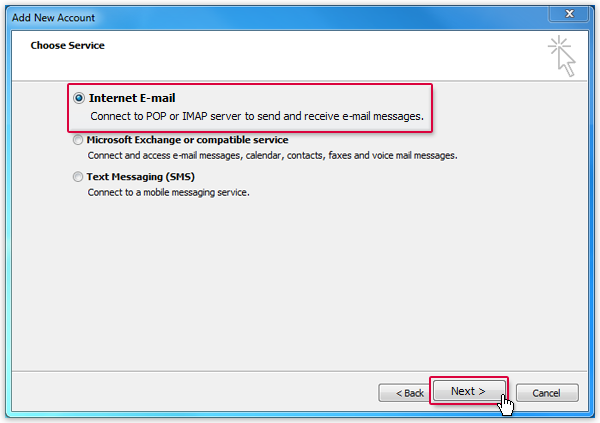
How to add your email account to Outlook 2010
-
Click
File, then
Info in the submenu and the
Add account button.

-
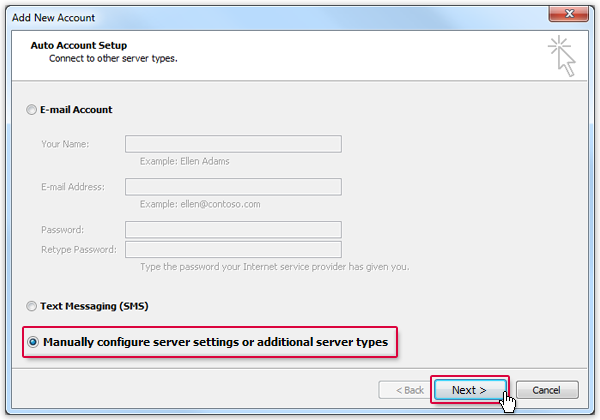
Select
Manually configure server settings or additional server types and click on
Next.
-
Select
Internet Email and click on
Next.
-
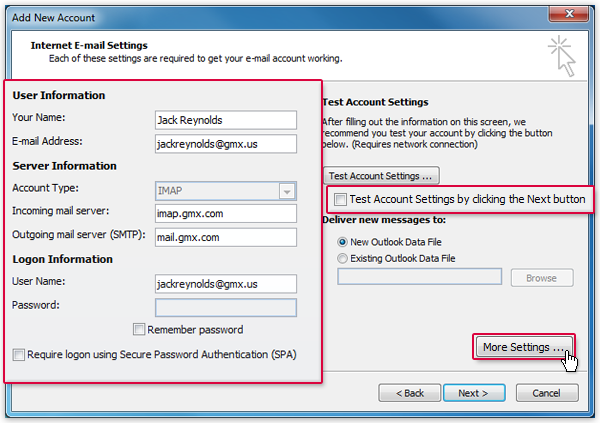
Enter your name and email address. Select IMAP for the
account type and enter imap.gmx.com as incoming server and
mail.gmx.com as outgoing server.
Enter yourGMX username and password. Uncheck
Test Account Settings by clicking the Next button.
Click on More Settings.
-
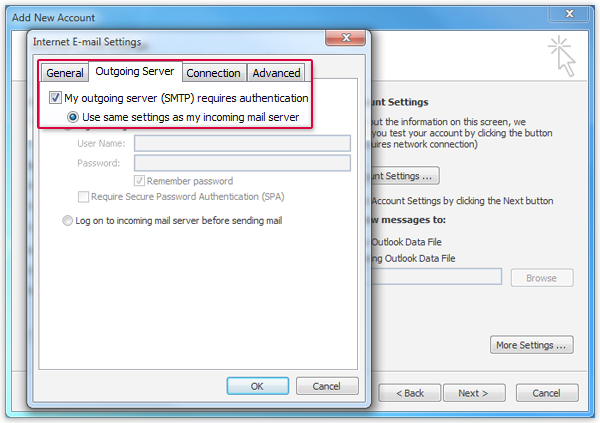
Select the
Outgoing Server tab. Check
My outgoing server requires authentication.
-
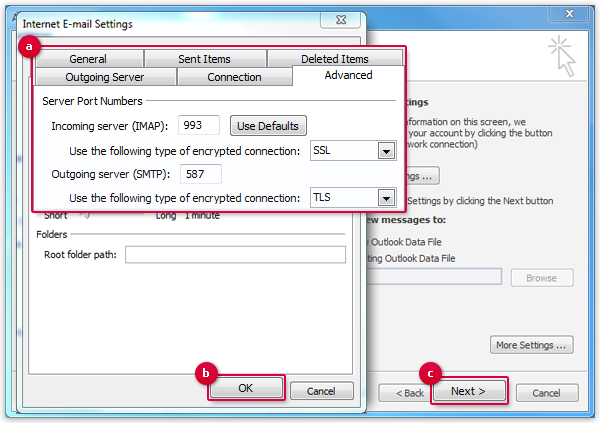
Select the
Advanced tab. Enter
993 next to
Incoming server and select
SSL as encrypted connection type. Enter
587 next to
Outgoing server and select
TLS as encrypted connection type (a). Click
OK(b) and on
Next (c).
Next step: You need to link the folders so that your email will be filed in the correct folders.
How to link your folders in Outlook 2010
-
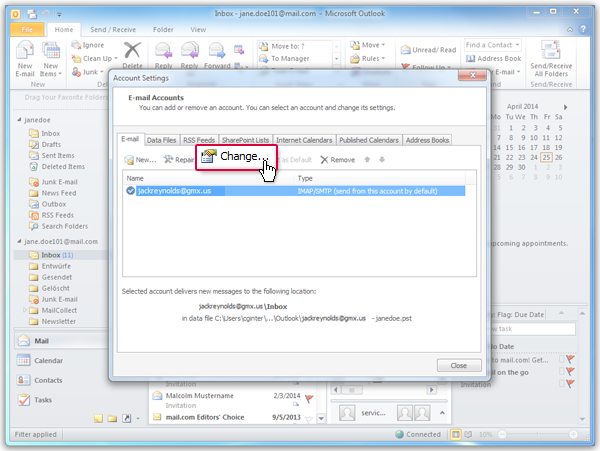
Click on
Account settings in the
File menu and on the button which appears with
the same label.

-
Select your GMX email address and click on
Change.
-
Click on
More Settings.

-
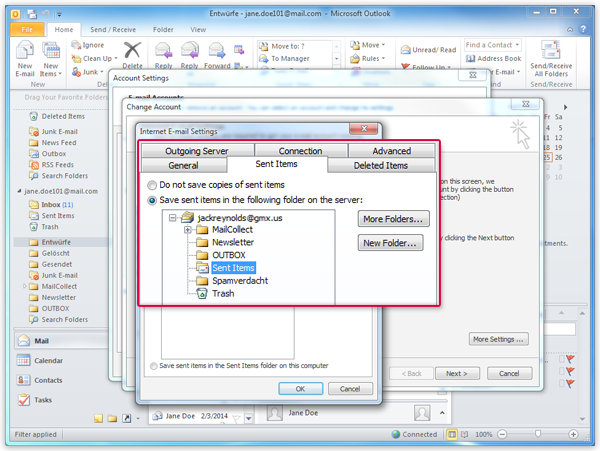
Switch to the
Sent Items tab and select the
Sent folder.
-
Confirm by clicking OK and Next.
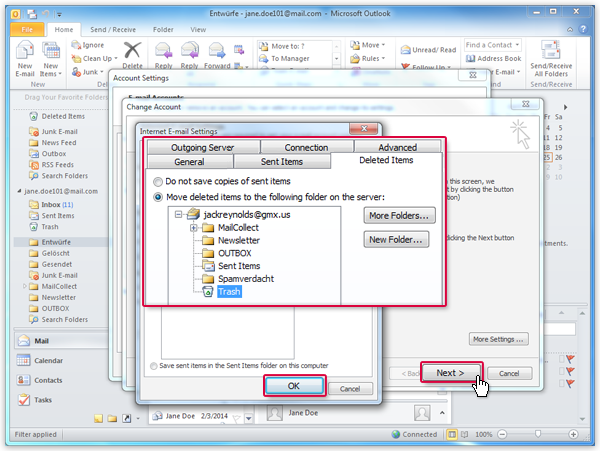
Outlook 2010 will test the settings.
Was this article helpful?