Personalizing GMX Go! for Chrome

You can personalize GMX Go! for Chrome by moving around the tiles of your favourite websites, starting from the second row of tiles. Add new websites, rearrange them or edit already existing ones.

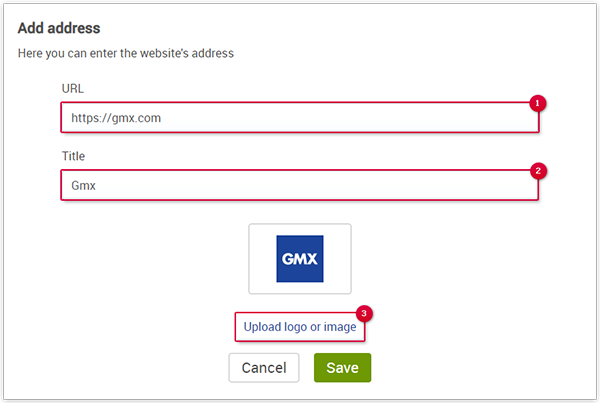
Adding new website-tiles in GMX Go! for Chrome
  1. Click on the plus-icon.
    A window with Information about the new website will open.
  2. Input the URL-address of the new website in the URL-field. Choose between the following methods:
    • Type in the address manually. (a)
    • Paste the copied URL-address from your clipboard.(b)
    Info:

    When manually typing in the URL-address of the new website, be aware of using the correct domain extension (.com, .net, .org). In some cases the correct website can be recognized even with a false domain extension. When pasting a URL from your clipboard, note that you can also insert a URL leading to a subpage of the website. This allows you to navigate to a specific subpage even faster.

  3. After the Input, click anywhere on the white space around the URL-field.
    If the website is recognized successfully, GMX Go! for Chrome will automatically fill out the Title of the website and upload a logo or image.
  4. Click on the Title-field to change its content afterwards or klick on Upload logo or image to insert your own logo or image.
  5. Click on Save.


The new website-tile will appear among the other, already existing ones.
Rearranging website-tiles in GMX Go! for Chrome
  1. Click and hold a website-tile, starting from the second of tiles.
  2. Move the tile to a different spot.
    The surrounding tiles will be rearranged automatically.
  3. Let go off the left mouse button to place the tile in the new spot.


The order of the other website-tiles will be updated automatically.
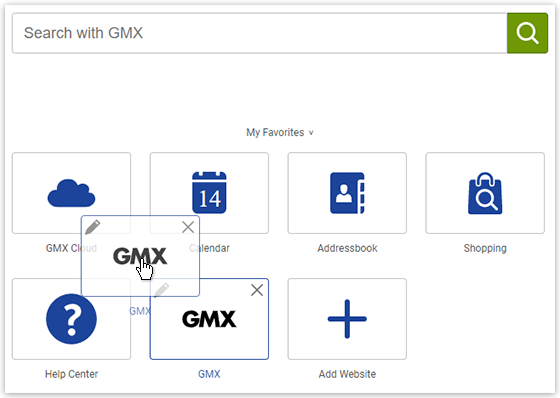
Editing already existing website-tiles in GMX Go! for Chrome
  1. Move your mouse on top of a website-tile, starting from the second row of tiles.
  2. Click on the pencil-icon.


    A window with information about the website will open.
  3. Edit the URL-addressand the Title of the website or Upload a logo or image.
  4. Click on Save.


The website-tile will be updated with the new information.
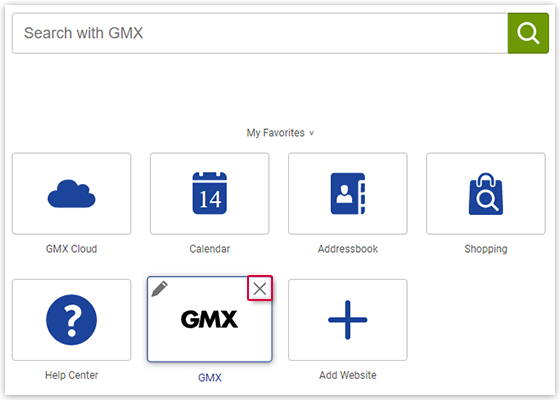
Deleting website-tiles in GMX Go! for Chrome
  1. Move your mouse on top of a website-tile, starting from the second row of tiles.
  2. Click on the delete-icon.


The website-tile has been deleted.

Was this article helpful?