Change Key Password

You can easily change your key password in the Mailvelope addon in your browser.

First, change your key password in Mailvelope. Then create a new recovery document to use the your new key password on other devices.

Change Your Key Password in Mailvelope

Open your browser with the installed Mailvelope-addon and follow these steps:
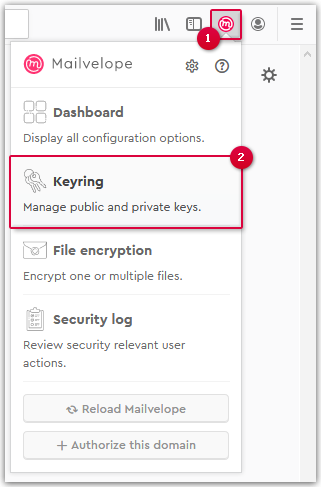
  1. Click the Mailvelope icon in the menu bar.
  2. Click Keyring.

    Mailvelope PW change step 1

  3. Select the key for GMX from the drop-down menu in the upper right corner.
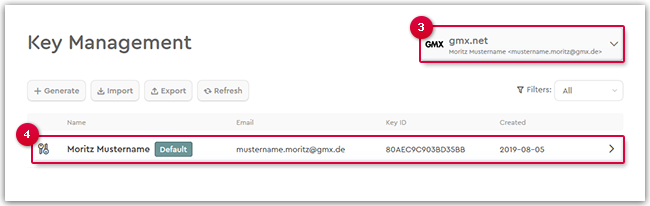
  4. Click on your email-address for the selected key to expand the details.

    Mailvelope PW change step 2

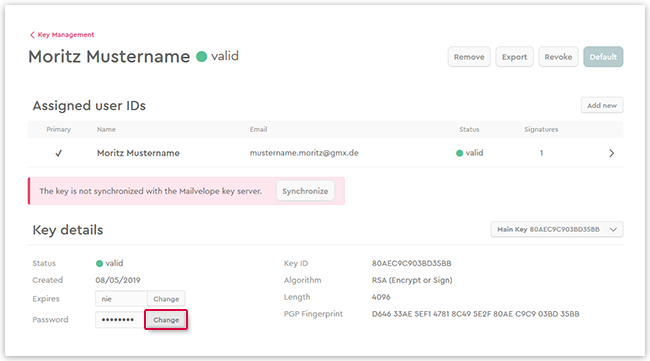
  5. Next to Password, click Change.

    Mailvelope PW change step 3

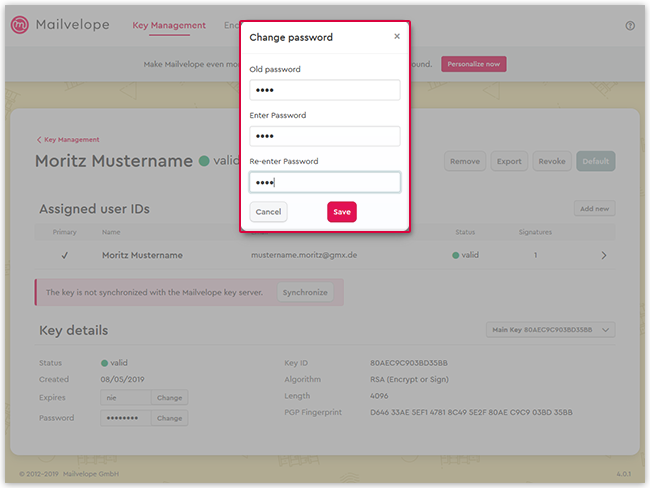
  6. Enter your old password and create a new one, then click Save.

    Mailvelope PW change step 4

    Your key password has been changed.
    Info:

    If you write a new encrypted email, you will be asked for this password. If you want to use Encrypted Communication on other devices, you have to create a new recovery document. After that, you have to follow the recovery process on your device.

Creating a new recovery document

Create a recovery document to be able to restore lost encryption data and to use encrypted communication on other devices.

  1. In your Inbox, click Settings.
  2. Click Security, then click Encryption.
  3. Click Backup and Recovery, then click Create Recovery Document.
    A new recovery document is created and shown in a new window.
  4. Click Print.
Next step:

Keep your recovery document in a safe place for future reference.

Setting up Encrypted Communication on an Android Device after you have changed the key password in Mailvelope

If you changed your key password in Mailvelope on your computer, you have to synchronize your GMX Mail App for Android with the new password.

  1. Open your GMX Mail App for Android.
  2. Tap your device's menu button and then tap the Settings icon in the upper right corner.
  3. Delete the email address you use for Encrypted Communication by tapping the Trash icon.
  4. Tap Add account to set up your email address again.
  5. During the set up, select Activate encryption.
  6. Tap Scan QR code and scan the QR code at the bottom right of your recovery document.
    Info:

    If your device doesn't have a camera, you can enter your recovery code by hand. Tap Recovery Code.

  7. Tap Done to confirm.
You can now use Encrypted Communication with your new key password on your Android device.

Was this article helpful?